Steps to Configure Your WHMCS Integration
- by Ilona K.
- Obtain the module from the WHMCS Marketplace by visiting the link and selecting the "Get it Now" button.
Extract the downloaded .zip archive into the WHMCS directory, which could be, for instance, /var/www/whmcs. This directory will be referred to as WHMCS_MAIN_DIRECTORY throughout the instructions.
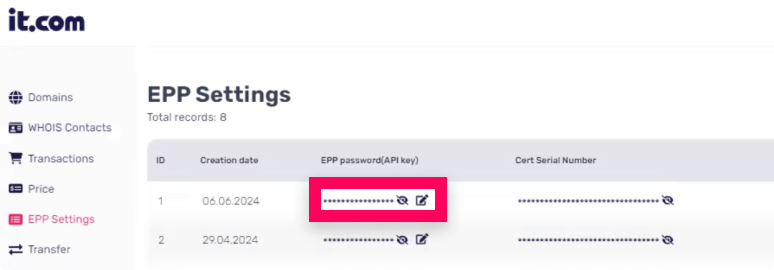
- Next, navigate to the it․com registrar's dashboard, access the EPP Settings section, and generate the necessary credentials and .csr certificate file. This procedure is thoroughly detailed in a separate manual article here.
- Upload the key and certificate files as follows:
Place the private key file (.key) in the corresponding sub-folder of your WHMCS directory. For example: WHMCS_MAIN_DIRECTORY/modules/registrars/ITcom/local_pk/
Next, place the certificate file (.crt) in the corresponding sub-folder of your WHMCS directory. For example: WHMCS_MAIN_DIRECTORY/modules/registrars/ITcom/local_cert/
- Proceed to your WHMCS Admin Area, then navigate to the System Settings and Domain Registrars menu.
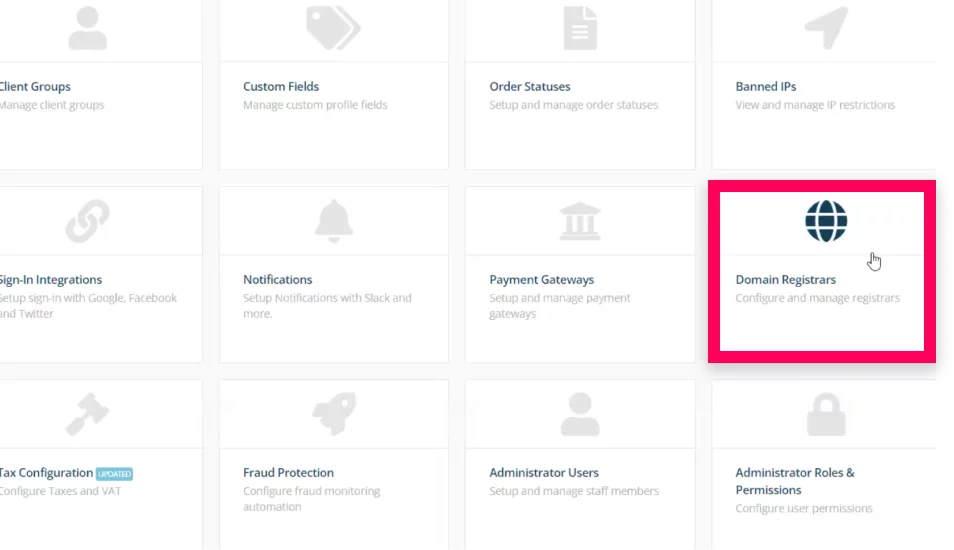
- Locate the "it․com" module from the list and click on the "Activate" button. Once the module is activated, click on the "Configure" button on the right.

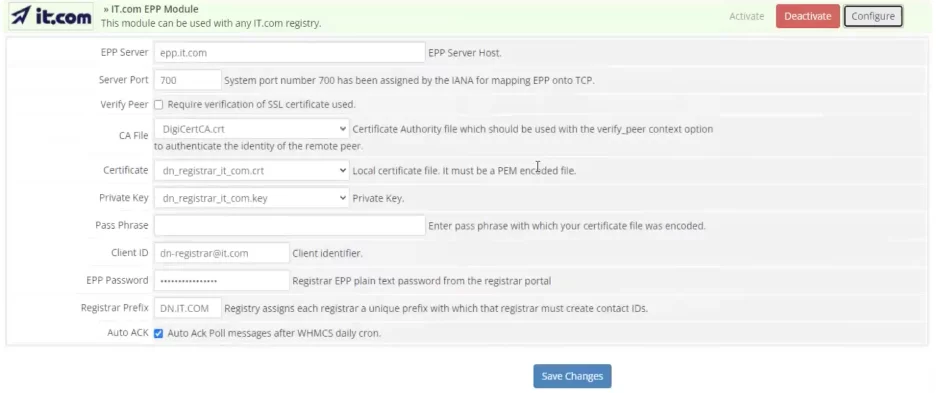
- Complete the fields or choose the appropriate values as shown in the screenshot below:
- EPP server: epp.it.com
- Server port: 700
- CA File: Select "DigiCertCA.crt" from the list
- Certificate: Choose the certificate file mentioned in step 3
- Private Key: Choose the private key file mentioned in step 3
The "Pass Phrase" field must be left blank - Client ID: Use your registrar's login, which is the email you used during registration
- Password: Enter your EPP password from the EPP dashboard. For more details, refer to this link
- Registrar Prefix: Prefix for EPP command identifiers sent to the server. You can specify any value
After filling all of the steps aboce dont forget to hit the "Save Changes" button.
- Next, add the WHOIS server to the WHMCS settings file at WHMCS_MAIN_DIRECTORY/resources/domains/whois.json
 {
        "extensions": ".it.com",
        "uri": "socket://whois.it.com",
        "available": "No match for"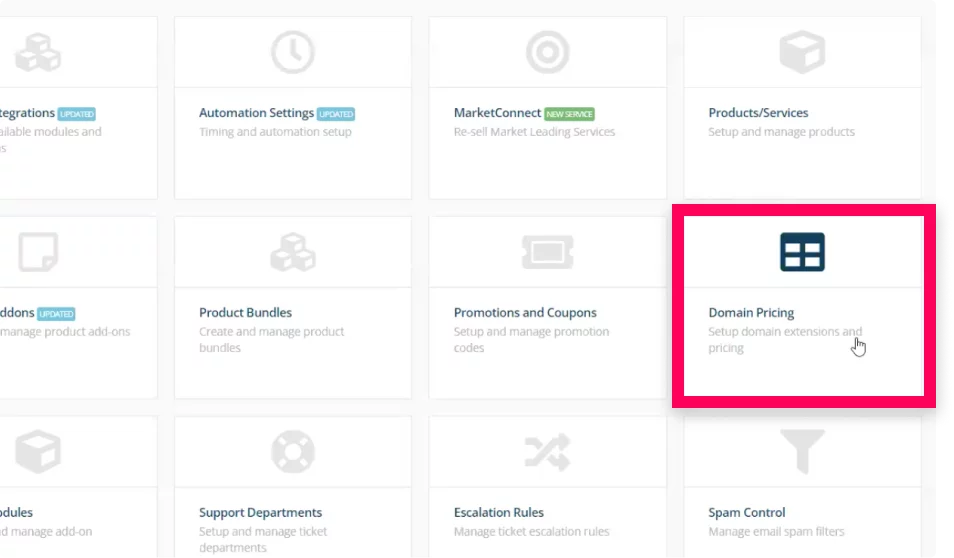
},- Finally, configure domain pricing in the corresponding menu item to complete the setup.

Share this post!
Read also